“Only wimps use tape backup: REAL men just upload their important stuff on ftp, and let the rest of the world mirror it”
– Linus Torvalds –
I really don’t have a clue whether that quote was intended as a joke or not but that’s beside the point. If you’ve worked in the IT industry for a while, you know that backup tapes have a lot of operational challenges. Back when I was a data center engineer, we had our enterprise backups taken using Tivoli Storage Manager (SQL Server native backups taken as files by TSM,) stored on tape and delivered at a secure remote location. Imagine the pain that we engineers had to go thru to retrieve tapes for tasks like auditing, data comparison, root cause analysis and, worse, disaster recovery. The fact that we had to retrieve tapes for disaster recovery has redefined (and documented) what our recovery objectives and service level agreements look like. We kept a week-old backup on local disk before completely declaring them as “on tape.”
Tapes are still being used today, primarily because they are cheap. In fact, ask any CTO or CIO why they still use tape and they’ll tell you almost the same thing: “it’s the cheapest storage solution around.” But there are other options. One of them is Microsoft Azure. If you are running SQL Server 2012 Service Pack 1 with Cumulative Update 2, you have the option to backup your databases to Azure Blob Storage natively (earlier versions of SQL Server can use the Microsoft® SQL Server® Backup to Microsoft Azure®Tool to do so.) You do need the following to test this out in your environment:
- A Microsoft Azure account
- An Azure Storage Account created to store the database backups
- A SQL Server 2012 instance with SP1 and CU2 installed or later versions. The SQL Server instance needs to be able to connect to Microsoft Azure
- A SQL Server login that has the db_backup operator role with Alter any credential permissions
Creating an Azure Storage Account using Windows PowerShell
Refer to this article that I wrote last year on how to get started with Windows PowerShell for Azure. Be sure to import your Azure publish settings file for authentication and install the Azure PowerShell module prior to running all of these cmdlets. My biggest reason for using PowerShell when dealing with Azure objects is primarily for automation (aside from the fact that I am sometimes annoyed when my Internet browser freezes.) I’ll use the New-AzureStorageAccount PowerShell cmdlet to create a new Azure Storage Account
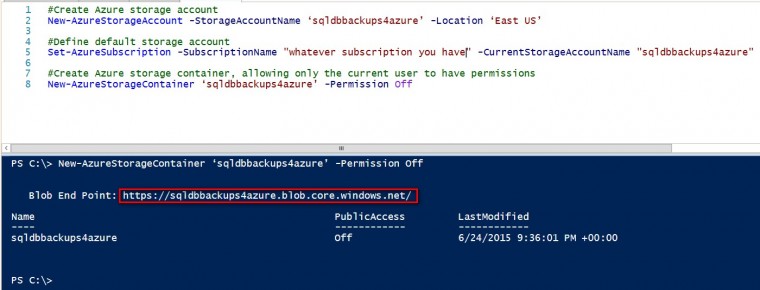
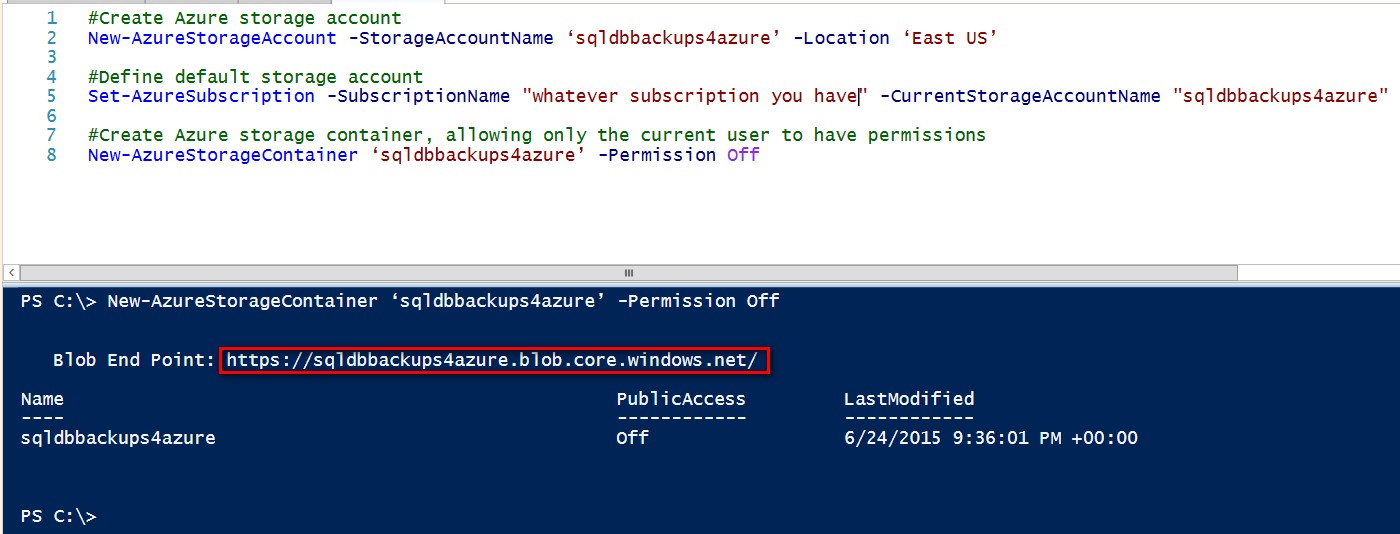
Once the storage account has been created, we need to create a storage container. We first need to make sure that the storage containers are created in the context of the storage account we just created. We’ll use the Set-AzureSubscription and New-AzureStorageContainer PowerShell cmdlets for these tasks.
Set-AzureSubscription -SubscriptionName ‘whatever subscription you have’ -CurrentStorageAccountName ‘sqldbbackups4azure’
#Create Azure storage container, allowing only the current user to have permissions
New-AzureStorageContainer ‘sqldbbackups4azure’ -Permission Off
Once we’ve created the storage account and storage container, we will need the URL endpoint that defines the storage container as well as the storage access key. The storage access key will be used for creating the credential inside SQL Server. Running the New-AzureStorageContainer PowerShell cmdlet will give you the blob endpoint for the storage container. Use that as a reference to build the URL endpoint that you will use for your SQL Server backups. It should be in the form blob endpoint + storage account container name.
In this example, the URL endpoint for the storage container is https://sqldbbackups4azure.blob.core.windows.net/sqldbbackups4azure
We will also use the Get-AzureStorageKey PowerShell cmdlet to retrieve the storage key that we will use to build the credential.
(Get-AzureStorageKey ‘sqldbbackups4azure’).Primary
NOTE: I’m only using this as an example. Don’t ever post your Azure storage keys publicly 🙂
Create a SQL Server Credential
Once we have the Azure storage account key, we can now create a SQL Server credential that we can use to connect SQL Server to the Azure storage account. But what is a SQL Server credential, anyway?
Because we are connecting to a resource outside of SQL Server – our Azure blob storage – we need a credential that will store the authentication mechanism we used in order to access that resource. We’ll use the name myAzureBlobStoreCredential for the credential.
--Create a credential to connect to the Azure storage account

--the IDENTITY parameter value should be the name of the storage account

CREATE CREDENTIAL myAzureBlobStoreCredential WITH IDENTITY = 'sqldbbackups4azure',

SECRET = 'lcbjFTKvf4eGg9n3RjqPFklzuwkZH8Ph6lB7aiZQe4iFINEJv/EYOCd+6VdtLPqGYjBnux57bHCdpKlgoFzHeg=='
A couple of things to note here to make sure you avoid the common pitfalls:
- The IDENTITY parameter needs to be the name of the Azure storage you created. In this example, it’s sqldbbackups4azure.
- The SECRET parameter is the Azure storage account key that you want to use. There is a primary and a secondary storage account key. We only need one
Backup your SQL Server databases to Microsoft Azure
So, we have the Azure storage account, a blob URL, and a storage account key. We can go ahead and backup our databases to Azure. Using the BACKUP DATABASE command,
--Backup the database to the Azure storage using blob URL

BACKUP DATABASE Northwind

TO URL = 'https://sqldbbackups4azure.blob.core.windows.net/sqldbbackups4azure/Northwind2012.bak'

WITH CREDENTIAL = 'myAzureBlobStoreCredential',

COMPRESSION, STATS

GO
This is the same BACKUP DATABASE command that we regularly use except that it uses the Azure storage container blob URL as a destination and the credential that we’ve created. Notice that I used the COMPRESSION and STATS options in the command. For one, I need to know how long my full database backups initially take to complete so that I’ll know if they still fall within the backup maintenance window. Second, because I’m copying the backup files onto Azure blob storage, the process will take up network bandwidth. I want to make sure that there is minimal impact to my network bandwidth when I run my backups. In countries where the Internet usage is metered, every bit of bandwidth saved means a lot. Of course, both of these depend a lot on your Internet subscription as well. Be sure to coordinate with your network engineers when you implement this feature. Besides, there’s a reason for the term “packet shaping.” You don’t want your backups failing because your network engineers implemented new firewall rules to throttle the bandwidth.
Restoring your SQL Server databases from backups in Microsoft Azure
You probably know by now that I don’t really believe in successful backups. What I do believe in is successfully restoring your backups. Since we’ve already managed to backup our databases in our Azure storage account, let’s test restoring those backups using the RESTORE DATABASE command. Note that this looks exactly like your typical RESTORE command except that the source is the storage blob URL with the name of the backup file and the credential that we’ve created to access the Azure blob storage.
--Restore database backups from Microsoft Azure

RESTORE DATABASE Northwind

FROM URL = 'https://sqldbbackups4azure.blob.core.windows.net/sqldbbackups4azure/Northwind2012.bak'

WITH CREDENTIAL = 'myAzureBlobStoreCredential'

,MOVE 'Northwind' TO 'C:\Program Files\Microsoft SQL Server\MSSQL.1\MSSQL\DATA\Northwind.mdf'

,MOVE 'Northwind_Log' TO 'C:\Program Files\Microsoft SQL Server\MSSQL.1\MSSQL\DATA\Northwind.ldf'

,STATS = 10

GO
Because of the need for the Azure storage account credential in the backup/restore process, you now have to include this in your disaster recovery runbook and coordinate with whoever is managing your Azure subscription.


Please note: I reserve the right to delete comments that are offensive or off-topic.